September 2019

Unlock Facebook All Types of FAQs & APP Spam Newest
Hello everyone, have come to my next article. This article I will share for you TUT Unlock all the latest forms of spam weight (with the requirement you must have a very standard fake IP software). Let's get started !
STEPS FOR IMPLEMENTATION
STEP 1:
Fake IP Cambodia + Lao Language (Use HMA to fake IP)
STEP 2:
Access the link and follow the order:
  • Link: https://m.facebook.com/help/contact/313733425335072 (spam 2-3 times)
  • Line 1: Facebook Email Locked
  • Line 2: Locked Facebook Name
  • Click send
STEP 3:
Access the link and follow the order:
  • Link: https://m.facebook.com/help/contact/1553947421490701 (no spam)
  • Line 1: The Facebook Name is Locked
  • Line 2: Facebook Email Locked
  • Line 3: ຂ້າ ພະ ເຈົ້າ ບໍ່ ໄດ້ ເຮັດ ຫຍັງ ຜິດ, ທ່ານ ມີ ຂໍ້ ຜິດ ພາດ ໃນ ເລື່ອງ ນີ້. ນີ້ ລຸ ນາ ເປີດ ບັນ ຊີ ສໍາ ລັບ ຂ້ອຍ ຖ້າ ທ່ານ ອ່ານ ຂໍ້ ຄວາມ ນີ້.
  • Click send
STEP 4:
Access the link and follow the order:
  • Link: https://m.facebook.com/help/contact/317389574998690 (spam 2-3 times) 
  • Line 1: The Facebook Name is Locked
  • Line 2: Birthday of Facebook Locked
  • Line 3: ຂ້າ ພະ ເຈົ້າ ບໍ່ ໄດ້ ເຮັດ ຫຍັງ ຜິດ, ທ່ານ ມີ ຂໍ້ ຜິດ ພາດ ໃນ ເລື່ອງ ນີ້. ອ່າ ລຸ ນາ ເປີດ ບັນ ຊີ ສໍາ ລັບ ຂ້ອຍ ຖ້າ ທ່ານ ອ່າ
  •  Line 4: Facebook Email Locked
  • Click send
STEP 5:
Access the link and follow the order:
  • Link: https://m.facebook.com/help/contact/167692083333796 (spam 2-3 times)
  • Line 1: Facebook Email Locked
  • Line 2: ສະ ບາຍ ດີ Facebook ທີມ ງານ, ນັ້ນ ແມ່ນ ສິ່ງ ທີ່ ຂ້ອຍ ຕ້ອງ ການ:
  •        - ຊື່ ເຕັມ: FB Name Locked
            - ວັນ ເດືອນ ປີ ເກີດ: Date of Birth Fb Locked
    - ອີ ເມລ: Email Fb Locked ຫມູ່ ເພື່ອນ ແລະ ຮູບ ພາບ ຂອງ ຂ້ອຍ ທັງ ຫມົດ ກວດ ສອບ ຕົ້ນ ໄມ້ ທັງ ສາມ ຢ່າງ ລະ ມັດ ລະ ວັງ. ບຸກ ໃຈ ທີມ ງານ ເຟ ສ ບຸກ.
  • Line 3: Rep mail:


  •         - ສະ ບາຍ ດີ Facebook ທີມ ງານ, ນັ້ນ ແມ່ນ ສິ່ງ ທີ່ ຂ້ອຍ ຕ້ອງ ການ:
            - ຊື່ ເຕັມ: Facebook Name Locked
            - ວັນ ເດືອນ ປີ ເກີດ: Facebook's Birthday is Locked
            - ອີ ເມວ: Facebook Email Locked ຫມູ່ ເພື່ອນ ແລະ ຮູບ ພາບ ທັງ ຫມົດ ຂອງ ຂ້ອຍ ລະ ມັດ ລະ ວັງ ກວດ ເບິ່ງ ສາມ ຕົ້ນ ໄມ້. ບຸກ ຊີ ຂອງ ຂ້າ ພະ ເຈົ້າ ຕ້ອງ ໄດ້ ຮັບ ການ ຟື້ນ ຟູ ຄືນ ໃຫມ່ ຂໍ ຂອບ ໃຈ ກັບ ທີມ ງານ ເຟ ສ ບຸກ.

    Click send

Any type of information please Contact us.

Accidentally left the caps lock on and typed something, but can't be bothered to start again and retype it all?
Simply enter your text and choose the case you want to convert it to.

Welcome to the Convert Case Text Generator Tool:

A very handy online text tool where you can change between lower case and upper case letters, where you can capitalize, uncapitalize, convert to mix case and transform your text. Explore the options below: Sentence Case The sentence case converter will allow you to paste any text you’d like, and it will automatically transform it to a fully formed structured sentence. It works by capitalizing the very first letter in each sentence, and will then go on to transform the rest of the text into lowercase as well as converting i’s into I’s. Every letter after a full stop will get converted into an upper case letter.
Note: it won’t, however, capitalize names or places. This is an example of sentence case.

Lower Case

If you are wondering how to uncapitalize text, this is exactly what the lower case text converter will allow you to do - it transforms all the letters in your text into small letters. Simply copy the text that you need generating into lower case and paste the text into the box above and select the ‘lower case’ tab.
this is an example of lower case.

Upper Case

The upper case transformer will take any text that you have and will generate all the letters into upper case ones. It will essentially make all lower case letters into CAPITALS (as well as keep upper case letters as upper case letters). To do this, you simply have to select the text that you need changing and pasting into the box above and then select the UPPER CASE tab.
THIS IS AN EXAMPLE OF UPPER CASE.

Capitalized Case

The capitalized case converter will automatically convert the starting letter of every word into an upper case and will leave the remaining letters as lower case ones. Simply copy the content that you will like to generate into this format, then paste into the box form above and select the Capitalized Case tab.
This Is An Example Of Capitalized Case.

Alternating Case

The alternating case converter will allow you to transform your text (no matter the current format) into text that alternates between lower case and upper case. It will generate a capital letter and then a lower case letter within the same word.
tHiS Is aN ExAmPlE Of aLtErNaTiNg cAsE.

Title Case

The title case converter is perfect for those who are a bit unsure on how to title an upcoming essay. It essentially ensures the correct letters are capitalized within the context of a title. Words such as “an” will be left all in lower case and words that are important will be converted such as “Title”.
This Is an Example of Title Case.
.. Click
Any type of information please Contact us.

Simple and easy to use strikethrough text generator. Convert standard text into crossed out text with this online strike text generator.

Strikethrough Your Text

Using this strikethrough text generator is incredibly simple to use. All you have to do is write up your normal text in the column on the left and you will see that the text is getting automatically crossed out in the column on the right.
Use any text you want, then you will see a line go through it - which you can then copy and paste it to wherever you like, whether that’s Facebook or Twitter.
Here’s an example of what you will get generated with letters and words with a slash in it.
T̶h̶i̶s̶ ̶i̶s̶ ̶a̶n̶ ̶e̶x̶a̶m̶p̶l̶e̶ ̶o̶f̶ ̶s̶t̶r̶i̶k̶e̶t̶h̶r̶o̶u̶g̶h̶ ̶t̶e̶x̶t̶.̶
.. Click
Any type of information please Contact us.

Hello guys today i will show you how to move games data/obb file to your sd card without rooting your phone.
"do at your own risk" it is not my responsibility if your phone breaks or whatever

Folllow Steps:

first make sure android version up to 6+ and download these apps
  1. virtualxposed download
  2. .. Download
  3. zarchiver download
  4. .. Download
note: before doing all of these steps, make sure the data/obb file of the game is placed on the sd card. [this method is only tested on offline games]
  1. after downloading and installing virtualxposed, open it and swipe down the screen.
  2. after swiping down the screen, open xposed installer.
  3. after opening the installer, click the 3 horizontal lines on the upper left side and click download.
  4. search "xinternalsd" choose 4.8 version and click download and install.
  5. when the installation is finished, click the 3 horizontal lines again on the upper left side and find modules. make sure to check the box "xinternalsd".
  6. go back and click the circle with 6 dots , and click "add app".
  7. select/check the google play games, google services, google playstore and the games you want to move the data/obb file to your sd card.
  8. go back and swipe down the screen, open xinternalsd.
  9. in xinternalsd, click "path to internal sd card" if you don't know what your going to do there, download and install "zarchiver" and check the name of your sdcard.
  10. click "enable for apps" and check those again.
  11. after doing all these steps, you must play the game in virtualxposed.
Any type of information please Contact us.

Facebook is the most popular and biggest social networking site. Facebook has various features according to different users. We can create pages, groups and even use normal profile. Facebook allows us to add all personal details along with profile & cover photo. Due to countless features of Facebook.
Today we will discuss another amazing Facebook trick related to Profile picture. By using this we can view locked Facebook profile pictures of anyone. Actually this not any kind of hack or even you are not breaking any kind of privacy. In this method you are directly making some changes which helps you to access that profile photo which is present in Database in actual size.Now here is way to view locked profile picture but make sure you are not going to offend someone. This is totally an educational based topic.

Follow the given steps :

  • First of all you need a Username or Profile ID of person whom profile picture you want to see.
  • Just copy the Username and Profile ID in notepad or anywhere.
  • https://graph.facebook.com/Paste-username-here/picture?width=800
  • Then replace the Paste-username-here from the below given link with the Username or profile ID.
  • https://graph.facebook.com/Zuck/picture?width=800
  • Then it will looks like as below.
  • Now to copy link and paste them into new tab of browser.
Press enter and see magic
In conclusion, this is only possible way to view locked Facebook profile picture easily. We hope it will work for you as well. We also advice you to use caution and good judgement in using this trick and not harm anyone’s privacy. Feel free to comment your views below

DU Meter 7.30 is an active internet usage monitor which gives the entire information regarding bandwidth use. DU Meter Crack tool advises on your download and upload rates and also computes the data transfer expenses. It’s a robust program that can help you to observe the data transfer rates and also as creates the full report of it and no matter which network you’re online with. Added capacity to produce stories of your data transfer prices. It will show you the network traffic in real-time. It has many new and Innovative functions. This program enables you to create reports on the daily, hourly and weekly basis. Additionally, it provides you with the ability to compare the incoming and outgoing traffic. This system offers you to observe the incredible graphs of network transfer speed which allow you to watch how many information your device is consuming.
It can alert you if certain limitations are surpassed. If you are feeling Ambiguity about it afterward, it’s especially helpful for you. DU meter Serial Key provides that the response to those and other puzzles. It’s possible to watch your data transfer speeds can be very enlightening regardless of what you do online. It allows you to utilize your internet connection better. Du meter hack sees just how much of your entire bandwidth potential is at any given stage. It is configured to match almost in the blank space. When you put in, there aren’t any changes in Windows documents. It utilizes only a tiny windows tools. DU Meter Serial number in your kid’ or employee’s computer. Additionally, It Also prevents other internet connections when the alert condition was fulfilled. Now, Wi-Fi signal tracking is currently offered. While fluctuations in the system seem like a channel will easily be correlated. There are several new color schemes for a better-blended functionality. Ever since, functioning using Windows 8, Windows 10 and are mostly compatible and have a friendly view. As a result, more comfortable than the last version which used and everybody can run it smoothly.

Key Characteristics:

  • DU Meter can be especially helpful for you
  • Just how much traffic quantity on the internet relationship
  • Can configure it to report to you through email
  • Use only smallish windows tools
  • Can prevent any further Internet connectivity.
  • Latest version awake unexpected network action
  • It may fix many issues
  • Boost security and compatibility with this application
  • Wi-Fi signal oversee is now accessible DU METER

Download:

.. Download
Any type of information please Contact us.

Teacher Assistant is an android project intended to help the teachers to track the class activity and the online attendance of the classroom students. Here the teacher can take the attendance of the students as well as can make the schedules for the upcoming subjective classes.

Slider

Moreover, the teacher can also calculate the CGPA of the students and submit them. Also, the teacher can post the notes highlighting the important topics related to the subjects.

DOWNLOAD

.. Download
Any type of information please Contact us.

Facebook has added a feature to keep him safe. This is called block link. As a result, the user can not share any link if his link is blocked by Facebook. This block link can no longer be posted.

How do I unblock?

We will unblock with only one method and report it to the Facebook Support Team.
Pay close attention to the following steps!
This report should be made more than 4 times with 20 mobile or computer.
  1. First enter the Facebook Help Center It should go to this link.
  2. You can see a box below. Now Facebook has to write something so that they understand your website link is completely anti-spam.
  3. I am writing a feedback below. If you are not able to write, then copy my entry and submit it here.
[accordion] [item title="Note"]
Hi, Facebook,
My website https://www.domain.com is perfectly safe and has been around since 2017. I often write very interesting articles and post my website links on my Facebook page Unfortunately, it seems that the high traffic to my website from Facebook raised a warning flag in your system and labelled my website as UNSAFE It is very irritating to key in the security code, and even when l keep my website article l have to double confirm it (see attached). When my fans click to go to my link, you warn them to only follow links that they trust, as if my website has malicious content l tried to inform you several times on your feedback but to no avail, so l am now writing an email and hope it can be fixed. It is ridiculous how you punish creators like us who had been producing good original contents on FB. You need to learn from Google how they reward content creators instead.
Thanks Regards
[/item] [/accordion]

Bass pasted this text into the box and waited for the submit. It may take a long time or it may be 2/3 days. Maximum time takes too long. wait! Waiting is the result,
Everyone will be fine Thanks for being with us. Hope you stay with us that way. This is our desire to be good and healthy. See you in the next post.
Any type of information please Contact us.

Grand Theft Auto V Pc Games Reviews & Free Download Game setup in single direct link for windows. Grand Theft Auto V PC Game is an action and adventure game.

Grand Theft Auto V PC Game Overview

[tab] [content icon="info-circle" title=" About"] GTA 5 is developed by Rockstar North and is published under the banner of Rockstar Games. The release date of this game is 14th April 2015. GTA V game can be played either by first person or by third person perspective.

GTA V PC Game Free Download and get ready for action. The story revolves around Michael Townley who is under the witness protection in Las Santos, San Andreas after mismanaged robbery attempt at Ludendorff. Michael discovered that his wife is cheating upon him and has an affair with her tennis coach. Furious to hear about the affair, Michael chased down the coach and destroyed him. All of this happened in a mansion owned by the girlfriend of a drug lord Martin Madrazo. Now Martin demands a heist at a jewelry shop from Michael and from here onwards Michael’s life changed, his family left him and he with his old pals has been left entangled in the criminal underworld. Now the team has to pull off several fatal heists for their survival in the cold-blooded city where nobody is trustworthy.

Features of GTA V PC Game

Following are the main features of GTA V PC Game that you will be able to experience after the first install on your Operating System.
  • Impressive action adventure game.
  • Major overhauling in technical and visual aspects.
  • New weaponry, vehicles included.
  • New wildlife included.
  • Denser traffic.
  • Enhanced weather system.
  • Includes brand new Rockstar editor.
  • Can use melee attack and other explosives.
  • Features multiple radio station playing different genres of music.
[/content] [content icon="check" title=" REQUIREMENT"] Before you start GTA V Free Download make sure your PC meets minimum system requirements
Minimum:
  • OS: Windows 8.1 64 Bit, Windows 8 64 Bit, Windows 7 64 Bit Service Pack 1, Windows Vista 64 Bit Service Pack 2* (*NVIDIA video card recommended if running Vista OS)
  • Processor: Intel Core 2 Quad CPU Q6600 @ 2.40GHz (4 CPUs) / AMD Phenom 9850 Quad-Core Processor (4 CPUs) @ 2.5GHz
  • Memory: 4 GB RAM
  • Graphics: NVIDIA 9800 GT 1GB / AMD HD 4870 1GB (DX 10, 10.1, 11)
  • Hard Drive: 65 GB available space
  • Sound Card: 100% DirectX 10 compatible
Recommended:
  • OS: Windows 8.1 64 Bit, Windows 8 64 Bit, Windows 7 64 Bit Service Pack 1
  • Processor: Intel Core i5 3470 @ 3.2GHz (4 CPUs) / AMD X8 FX-8350 @ 4GHz (8 CPUs)
  • Memory: 8 GB RAM
  • Graphics: NVIDIA GTX 660 2GB / AMD HD 7870 2GB
  • Hard Drive: 65 GB available space
  • Sound Card: 100% DirectX 10 compatible
  • Additional Notes:
[/content] [content icon="camera" title=" SCREENSHOTS"]
[/content] [content icon="camera" title=" GAMEPLAY"]
[/content] [content icon="download" title=" DOWNLOAD"] Torrent:
.. Download
[/content] [/tab]

Reviews:

[review] [item review-value="8"]Graphics[/item] [item review-value="9"]Game-play[/item] [item review-value="9"]Sound[/item] [content title="Summary" label="Overall Score"] GTA V PC Game Free Download and get ready for action. The story revolves around Michael Townley who is under the witness protection in Las Santos,It is an amazing action and Story games.[/content] [/review]

Basically engineering students need a Good quality Scientific Calculator for Problem Solving.Now-a-days several duplicate and local companies calculator are available in the market with low prize and impressive outlook for sales. But they didn't care about battery cell backup , button quality and more features such as software also.

Here are some steps to check whether the calculator software is original,

Follow Steps:

  1. Press and hold Following Three buttons at same time
  2. Shift button +Number7 button + ON button.
  3. Now in the display screen, you should see all options or all pixels are ON.
  4. Then press Shift button continuously till Number 1 appears on the screen.
  5. Now press all the buttons in the calculator starting fromAlpha button sequentially, except for the ON button.
  6. After pressing all buttons,
  7. finally press = then it should show 44 Ok .If it shows, 44 OK' then the calculator is good for your Engineering Mathematics..

Basically CASIO is a Good brand for Calculators...
Enjoy Calculating :-)

A few days ago there was a request how to make view count on the blog, I've shared previously Iori Kyun template that also use the feature views count. this time I will share a tutorial on how to install a post view count in blog.


view count is Often used to display a count of the number of people who see Reviews These post. that usually is Often found in wordpress theme about news, or Also in the theme for fanshare, streaming, pv, music and so forth, but sometimes the view count Also is not suitable for low visitor blogs: v that not cool not see the numbers low. view count actually is not really applicable to blogger. Because bloggers do not provide features view count. different from wordpress that has abundant features. but the lack of it does not apply to an expert blogger so he can created view count with the help of javascript and firebase, which is useful for storing the database. because the database is needed in view count.

This tutorial I have to providing my database, if you want to create a database themselves please follow the tutorial how to create a database or project in fire base quickly click here

  • Step : Install Post View Counter Plugin
  • Sign in to Blogger account and go to Blogger dashboard.
  • Click the arrow adjacent to 'Go to post list' icon and select 'Template' from the drop down menu. Alternately you can click 'Template' from left navigation menu if you're already within your blog.
  • Click 'Edit HTML'.
  • Skip this step if jQuery library already installed in your blog. Otherwise Search for (Ctrl+F) <head> and paste (Ctrl+V) the following code before </head>

<script type="text/javascript" src="//ajax.googleapis.com/ajax/libs/jquery/1.10.2/jquery.min.js"></script>
 

  • Search for (Ctrl+F) </b:>, copy (Ctrl+C) the following code and paste it (Ctrl+V) before </:skin>

.post-view{margin-right:8px!important;display:inline;background:#fefefe;color:#8c919b;padding:4px 8px;cursor:default;transition:all .3s ease-out}
.view-load{display:inline-block;width:20px;height:20px;background:transparent url('https://blogger.googleusercontent.com/img/b/R29vZ2xl/AVvXsEjEAcTsHlWcVPNRdWGlPgsbLgfzQmQDifuevzyDFXwZsapZQXno_vMGMdGcv9eH0QHLe-rgph73PqtcokUL68-vA7yYwVypm6qwILQhH1pnKnbZqPoV_vuPXuEdEs2XcTFGEynbGbQF9yEh/s1600/loader.gif') no-repeat 0 0;vertical-align:middle}

  • Search for (Ctrl+F) </head> and paste (Ctrl+V) the following code before </head>

 <script src='//cdn.firebase.com/js/client/2.2.1/firebase.js' type='text/javascript'></script>
<script type='text/javascript'>//<![CDATA[
$.eachundefined$undefined".post-view[data-id]"),functionundefineda,e){var l=$undefinede).parentundefined).findundefined"#postviews").addClassundefined"view-load"),i=new Firebaseundefined"https://priosoft.firebaseio.com/pages/id/"+$undefinede).attrundefined"data-id"));i.onceundefined"value",functionundefineda){var n=a.valundefined),t=!1;null==n&&undefinedn={},n.value=0,n.url=window.location.href,n.id=$undefinede).attrundefined"data-id"),t=!0),l.removeClassundefined"view-load").textundefinedn.value),n.value++,"/"!=window.location.pathname&&undefinedt?i.setundefinedn):i.childundefined"value").setundefinedn.value))})});
//]]>
</script>
  • Search for (Ctrl+F) post-header. You'll find the a code similar to the following one.
 <div class='post-header'>
  or
<div class='header class'/>
  • if met then add the code below right before the above code

<div expr:data-id='data:post.id' class='post-view'><i class='fa fa-eye'></i> <span class='view-load' id='postviews'>0</span> View</div>

  • The result is like the example below

<div expr:data-id='data:post.id' class='post-view'><i class='fa fa-eye'></i> <span class='view-load' id='postviews'>0</span> View</div>
..........
.......
</header>

For display view count in footer post (under the description of post)

  • Then click the Save template

  • Search for (Ctrl+F) 'post-footer. You'll find the a code similar to the following one.

<div class='post-footer'>
or
<footer class='post-footer'>


  • if met then add the code below right before the above code

  • <div expr:data-id='data:post.id' class='post-view'><i class='fa fa-eye'></i> <span class='view-load' id='postviews'>0</span> View</div>

    • The result is like the example below

    <footer class='post-header'>
    <div expr:data-id='data:post.id' class='post-view'><i class='fa fa-eye'></i> <span class='view-load' id='postviews'>0</span> View</div>
    ..........
    .......
    </footer>
    • You're done. Now Save template and see result by refreshing page.


    • Customization

        • Replace "https://priosoft.firebaseio.com" With Your Firebase url.

        Any type of information please Contact us.

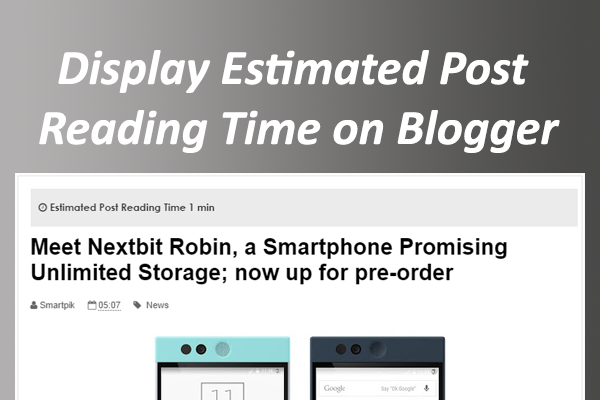
    How to add an Estimate Post Reading Timer Plugin in Blogspot Blog - Today Priosoft will share a new widget that is quite interesting. With the help of this plugin, your readers can easily know about your article reading time (e.g How much time it will take to read this article).
    Now, before you set up this timer plugin on your blog, make sure to take a look of this widget by clicking on the below demo button. (Just look at the "Title" of this article.)
    For those who want to try this plugin on your own blog, simply follow the below simple steps.
    • Sign in to Blogger account and go to Blogger dashboard.
    • Click the arrow adjacent to 'Go to post list' icon and select 'Template' from the drop down menu. Alternately you can click 'Template' from left navigation menu if you're already within your blog.
    • Click Edit HTML.
    • Skip this step if jQuery library already installed in your blog. Otherwise Search for (Ctrl+F) </head> and paste (Ctrl+V) the following code before </head>
    • <script type="text/javascript" src="https://maxcdn.bootstrapcdn.com/font-awesome/4.5.0/css/font-awesome.min.css"></script>
    • Search for (Ctrl+F) </b:skin>, copy (Ctrl+C) the following code and paste it (Ctrl+V) before </b:skin>
    • Apply the below code just before ]]></b:skin>.
    • span.right {float:center;display:inline-block;padding:10px 5px;}
      .read-time{padding:5px;width:100%;background:#ebebeb;margin-bottom:10px;font-family: "Avant Garde",Avantgarde,"Century Gothic",CenturyGothic,AppleGothic,sans-serif;font-weight:700;font-size:12px;}
      
    • Copy the below JavaScript code and paste it just before </body>
    •  <script type='text/javascript'>//<![CDATA[
      !function(e){e.fn.readingTime=function(n){var t={readingTimeTarget:".eta",wordCountTarget:null,wordsPerMinute:270,round:!0,lang:"en",lessThanAMinuteString:"",prependTimeString:"",prependWordString:"",remotePath:null,remoteTarget:null,success:function(){},error:function(){}},i=this,r=e(this);i.settings=e.extend({},t,n);var a=i.settings;if(!this.length)return a.error.call(this),this;if("it"==a.lang)var s=a.lessThanAMinuteString||"Meno di un minuto",l="min";else if("fr"==a.lang)var s=a.lessThanAMinuteString||"Moins d'une minute",l="min";else if("de"==a.lang)var s=a.lessThanAMinuteString||"Weniger als eine Minute",l="min";else if("es"==a.lang)var s=a.lessThanAMinuteString||"Menos de un minuto",l="min";else if("nl"==a.lang)var s=a.lessThanAMinuteString||"Minder dan een minuut",l="min";else if("sk"==a.lang)var s=a.lessThanAMinuteString||"Menej než minútu",l="min";else if("cz"==a.lang)var s=a.lessThanAMinuteString||"Méně než minutu",l="min";else if("hu"==a.lang)var s=a.lessThanAMinuteString||"Kevesebb mint egy perc",l="perc";else var s=a.lessThanAMinuteString||"Less than a minute",l="min";var u=function(n){if(""!==n){var t=n.trim().split(/\s+/g).length,i=a.wordsPerMinute/60,r=t/i;if(a.round===!0)var u=Math.round(r/60);else var u=Math.floor(r/60);var g=Math.round(r-60*u);if(a.round===!0)u>0?e(a.readingTimeTarget).text(a.prependTimeString+u+" "+l):e(a.readingTimeTarget).text(a.prependTimeString+s);else{var o=u+":"+g;e(a.readingTimeTarget).text(a.prependTimeString+o)}""!==a.wordCountTarget&&void 0!==a.wordCountTarget&&e(a.wordCountTarget).text(a.prependWordString+t),a.success.call(this)}else a.error.call(this,"The element is empty.")};r.each(function(){null!=a.remotePath&&null!=a.remoteTarget?e.get(a.remotePath,function(n){u(e("<div>").html(n).find(a.remoteTarget).text())}):u(r.text())})}}(jQuery);
      //]]>
      </script>
    • Now apply the below code anywhere you want to show this widget.
    •  <div class='read-time'>
      <span class='right'><i class='fa fa-clock-o'/> Estimated Post Reading Time <span class='eta'/></span></div>
      
    Any type of information please Contact us.

    [tab] [content icon="info-circle" title=" About"] Nokia 7.2 launched in September, 2019. It brings features like Zeiss optics, LED flash, panorama, HDR, Fast battery charging 10W. It also comes with 6.3-inch touchscreen display with a resolution of 1080 pixels by 2280 pixels. The Nokia 7.2 runs Android 9.0 (Pie) and is powered by a 3500mAh non removable battery and also comes with octa-core (4x2.2 GHz & 4x1.8 GHz) processor with 4/6 GB of RAM. It measures 159.9 x 71.2 x 8 (height x width x thickness) and weighs 160.00 grams. It also includes Triple 48 MP+8 MP+5 MP Back camera with 20 MP in Front.
    Price 27,990৳ - 30,990৳
    Display 6.3 inches, 99.1 cm2
    Camera Triple 48 MP+8 MP+5 MP Back, Front 20 MP
    RAM 4/6 GB
    Storage 64/128 GB
    Processor Octa-core (4x2.2 GHz & 4x1.8 GHz)
    Battery 3500 mAh battery
    [/content] [content icon="mobile" title=" Specifications"]
    Physical Specifications
     
    Dimensions
    159.9 x 71.2 x 8 mm
    Weight
    160 g
    Body Material
    Front/back glass (Gorilla Glass 3), plastic frame
    Fingerprint Sensor
    Yes
    SIM
    Single SIM (Nano-SIM) or Hybrid Dual SIM (Nano-SIM, dual stand-by)
    Colors Available
    Cyan Green, Charcoal, Ice
    Display Features
     
    Protection
    Corning Gorilla Glass 3
    Type
    IPS LCD capacitive touchscreen
    Size
    6.3 inches, 99.1 cm2
    Resolution
    1080 x 2280 pixels, 19:9 ratio
    Storage
     
    Internal
    64/128 GB
    RAM
    4/6 GB
    Card Slot
    microSD, up to 512 GB (dedicated slot)
    Main Camera
     
    Camera
    Triple 48 MP+8 MP+5 MP
    Special Features
    Zeiss optics, LED flash, panorama, HDR
    Video
    2160p@30fps, 1080p@30fps (gyro-EIS)
    Selfie Camera
     
    Camera
    20 MP
    Video
    1080p@30fps
    Special Features
    Zeiss optics, HDR
    Processor & Operating Interface
     
    Chipset
    Qualcomm SDM660 Snapdragon 660 (14 nm)
    CPU
    Octa-core (4x2.2 GHz Kryo 260 & 4x1.8 GHz Kryo 260)
    GPU
    Adreno 512
    OS
    Android 9.0 (Pie); Android One
    Audio Features
     
    3.5mm Jack
    Yes
    Loudspeaker
    Yes
    Others
    Active noise cancellation with dedicated mic
    Connectivity
     
    Network Technology
    GSM / HSPA / LTE
    WIFI
    Wi-Fi 802.11 b/g/n/ac, dual-band, Wi-Fi Direct, hotspot
    Bluetooth
    5.0, A2DP, EDR, LE, aptX
    USB
    2.0, Type-C 1.0 reversible connector, USB On-The-Go
    NFC
    Yes (excl. LATAM, USA, IN)
    Radio
    FM radio
    Battery
     
    Type
    Li-Po
    Capacity
    3500 mAh battery
    Other Special Features
     
    Sensors
    Fingerprint (rear-mounted), accelerometer, gyro, proximity, compass
    Battery Charging
    Battery charging 10W
    [/content] [content icon="eye" title=" Reviews"] [review] [item review-value="8"]Processor[/item] [item review-value="7"]Gameplay[/item] [item review-value="6"]Camera[/item] [item review-value="6"]Graphics[/item] [item review-value="9"]Sound[/item] [content title="Summary" label="Overall Score"]Nokia 7.2 launched in September, 2019. It brings features like Zeiss optics, LED flash, panorama, HDR, Fast battery charging 10W. It also comes with 6.3-inch touchscreen display with a resolution of 1080 pixels by 2280 pixels. The Nokia 7.2 runs Android 9.0 (Pie) and is powered by a 3500mAh non removable battery and also comes with octa-core (4x2.2 GHz & 4x1.8 GHz) processor with 4/6 GB of RAM. It measures 159.9 x 71.2 x 8 (height x width x thickness) and weighs 160.00 grams. It also includes Triple 48 MP+8 MP+5 MP Back camera with 20 MP in Front.[/content] [/review] [/content] [/tab] [img featured="1" src="https://blogger.googleusercontent.com/img/b/R29vZ2xl/AVvXsEg9oe3fDvpEmq-GxBs2hqJORohxbBhg4KkwFNfQAwe5m81Z49Xw3eh1iW7An7SBT4XuHFAnjyWnqlwk3zOpb70nQFHSmqH0vXT3Gz5xYqluSMqdyoAT9nlIOSmO2VcH5QbQJafeX6fAAD0/s1600/nokia+7.2.jpg" width="350px" height="800px"/] [img featured="1" src="https://blogger.googleusercontent.com/img/b/R29vZ2xl/AVvXsEhZQAtcaWvVQKCDZDJ5bRjVcowcTFLS-7eWOdaufVW3luP5MOK_5ISzjO0TSAEYumKV5D6IzuToVPdrGfSAFyd5suuJQzb0G079mMlPJzo8SObg9QkZCq2UVqnG3cU9o7dmWMr-YLpv00Tv/s640/nokia-72-and-62+launched.webp" width="350px" height="800px"/]

    বাংলাদেশের শিক্ষা বোর্ড এর অধীনে অনুষ্ঠিতব্য সকল পরীক্ষার (PSC, JSC, JDC, SSC, HSC Result) রেজাল্ট দেখে নিন খুব সহজে। পরীক্ষার ফলাফল দ্রুত জানার জন্য আমরা বিভিন্ন অনলাইন পেজ এর সহায়তা নিয়ে থাকি, কিন্তু ফলাফল জানার সঠিক লিংক পেজ গুলোতে না থাকায় আমাদের বিড়ম্বনায় পড়তে হয়। যা আমাদের বিরক্তির উদ্রেগ সহ ফলাফল পেতে বিলম্বিত করে। তাই আমরা স্টুডেন্ট ও অভিবাবক দের কথা বিবেচনা করে জেএসসি, জেডিসি, এসএসসি, এইচএসসি ও মাদ্রাসা বোর্ড এর সকল পরীক্ষার ফলাফল জানার সঠিক লিংক এবং মোবাইল এর এসএমএস এর মাদ্ধমে কিভাবে সহজে পেতে পারেন আলোচনা করবো - Check PSC, JSC, JDC, SSC, HSC, Madrasha Board Result with Mark sheet

    JSC, JDC, SSC, HSC Result:

    JSC, JDC, SSC, HSC, Diploma in commerce, Vocational, Madrasha Board Result জানার জন্য //www.educationboardresults.gov.bd/ এখানে প্রবেশ করুন অথবা নিচের ছবিতে ক্লিক করুন -
    যাদের পূর্বে অনলাইন এ ফলাফল যাচাই করার অভিজ্ঞতা নেই তাদের জন্য রেজাল্ট চেক করার ধারাবাহিক পদক্ষেপ গুলো নিচে দেয়া হলো :

    • Examination: আপনি কোন পরীক্ষার ফলাফল জানতে চান তা লিস্ট থেকে নির্বাচন করুন।  যেমন -  এইচএসসি হলে "HSC/Alim" নির্বাচন করুন। 
    • Year: যে বৎসর এর ফলাফল জানতে চান তা নির্বাচন করুন।
    • Board: যে বোর্ড থেকে পরীক্ষায় অংশগ্রহণ করেছেন তা নির্বাচন করুন।  যেমন ঢাকা থেকে হলে "Dhaka"   
    • Roll: পরীক্ষার রোল প্রদান করুন ।  
    • Reg.No: রেজিস্ট্রেশন নম্বর প্রদান করুন।
    • 7 + 2:  ভেরিফিকেশন এর জন্য ৯ প্রদান করুন (৭ + ২ = ৯)
    সকল ফিল্ড পূরণ করার পরে "Submit" বাটন চাপুন। এরপর আপনার কাঙ্খিত ফলাফল প্রদর্শিত হবে।

    মোবাইলের SMS মাধ্যমে রেজাল্ট পেতে:

    [alert title="SMS" icon="info-circle"] JSC, JDC, SSC, HSC রেজাল্ট এসএমএস এর মাধ্যমে পেতে ম্যাসেজ অপসন এ যান এবং নিচের কোড টাইপ করুন - JSC DHA Roll Number Send to 16222
    JDC MAD Roll Number Send to 16222
    SSC/Alim <> First three letters of your Board name <> Roll no <>2018 and send to 16222.
    Example: SSC Dha 153630 2018 send to 16222
    HSC 1st 3 letter of HSC Board HSC Roll No 2016 & send to 16222br/> Alim Mad HSC Roll No 2017 & send to 16222 br/> HSC (Vocational) Tec HSC Roll No 2017 & send to 16222 br/> [/alert]

    বাংলাদেশ শিক্ষা বোর্ড এর সাংকেতিক নাম নিচে দেয়া হলো:

    • DHA = Dhaka Board
    • BAR = Barisal Board
    • SYL = Sylhet Board
    • COM = Comilla Board
    • CHI= Chittagong Board
    • RAJ = Rajshahi Board
    • JES = Jessore   Board
    • DIN = Dinajpur Board
    • MAD = Madrasah Board

    প্রাথমিক/ইবতেদায়ী শিক্ষা সমাপনী পরীক্ষা (PSC Result):

    //180.211.137.51:5839/ সার্ভারে প্রবেশ করে আপনি প্রাথমিক/ইবতেদায়ী শিক্ষা সমাপনী পরীক্ষা (PSC Result) যাচাই করতে পারেন। উল্লেখিত সাইট এ প্রবেশ করলে নিচের ছবির মতো প্রদর্শিত হবে-

    PSC Result ফলাফল দেখার জন্য নিম্নোক্ত পদক্ষেপ গুলো অনুসরণ করুন -

    1. পরীক্ষার নামঃ  লিস্ট থেকে পরীক্ষার নাম নির্বাচন করুন "প্রাথমিক অথবা ইবতেদায়ী শিক্ষা সমাপনী পরীক্ষা"
    2. পরীক্ষার সন: পরীক্ষার সন নির্বাচন করুন  
    3. বিভাগঃ  কোন বিভাগ থেকে পরীক্ষায় অংশগ্রহণ করেছেন সেটি নির্বাচন করুন   
    4. কোন জেলা থেকে পরীক্ষায় অংশগ্রহণ করেছেন সেটি নির্বাচন করুন  
    5. উপজেলা/থানাঃ কোন উপজেলা/থানা থেকে পরীক্ষায় অংশগ্রহণ করেছেন সেটি নির্বাচন করুন    
    6. রোল নম্বরঃ পরীক্ষার রোল নম্বর প্রদান করুন
    7. সব শেষে "সমর্পন করুন" বাটন চাপুন।

    মোবাইলে এসএমএস (Mobile SMS) এর মাধ্যমে PSC Result ফলাফল জানতে নিচের পদ্ধতি অনুসরণ করুন

    [alert title="SMS" icon="info-circle"] DPE<space> Code Number of Thana or Upazila <space>Roll Number & Send it to 16222
    Example:  DPE 48 252527 and send 16222
    [/alert]
    Any type of information please Contact us.

    Toady I will Share Marquee Title On Address Bar Using JavaScript That I using My Site.
    1. Login back to your blogger account Select your blog < Template < Edit HTML
    2. Save a backup of your blog template code first, now click inside the template code box.
    3. Now Find the <head> By Pressing Ctrl+F (Windows) or CMD+F (Mac)
    4. Step  Copy and Paste the below code above </head>

    Source Code

     <script>msg = document.title;  
       msg = "          " + msg;pos = 0;
       function scrollMSG() {
       document.title = msg.substring(pos, msg.length) + msg.substring(0, pos);
       pos++;
       if (pos >  msg.length) pos = 0
       window.setTimeout("scrollMSG()",200);
       }
       scrollMSG();</script>
    

    Any type of information please Contact us.

    Link to make a blog on the sound, this is a tip to make a link to make a sound, Link will make a sound (sound) when cursor (hover link with sound), or also Link makes a sound when clicked (click link with sound). For sound effects use files such as mp3 (audio mp3), mp4 (audio mp4), ogg (audio ogg), wav (audio wav). The file used is inline Javascript and 2 audio files. For audio files that are used if possible, they must have a small size so as not to overload the loading load.

    Preview (demo) Link Use Sound:

    [accordion] [item icon="eye" title="DEMO"]1. Hover Link Sound
    HOVER LINK WITH SOUND
    2. Click Link Sound
    CLICK LINK WITH SOUND
    3. Hover and Click Link Sound
    CLICK & HOVER LINK WITH SOUND

    If anyone is interested below is a copy of Javascript, for javascript it can be pasted directly on the blog or also uploaded on web hosting [/item] [/accordion]

    Source Code

    [lock]
     <script>function createsoundbiteundefinede){var t=document.createElementundefined"audio");ifundefinedt.canPlayType){forundefinedvar n=0;n<arguments.length;n++){var r=document.createElementundefined"source");r.setAttributeundefined"src",arguments[n]);ifundefinedarguments[n].matchundefined/\.undefined\w+)$/i))r.setAttributeundefined"type",html5_audiotypes[RegExp.$1]);t.appendChildundefinedr)}t.loadundefined);t.playclip=functionundefined){t.pauseundefined);t.currentTime=0;t.playundefined)};return t}else{return{playclip:functionundefined){throw new Errorundefined"Your browser doesn't support HTML5 audio unfortunately")}}}}var html5_audiotypes={mp3:"audio/mpeg",mp4:"audio/mp4",ogg:"audio/ogg",wav:"audio/wav"};var mouseoversound=createsoundbiteundefined"https://sites.google.com/site/binkbenk77/hoversound.ogg");var clicksound=createsoundbiteundefined"https://sites.google.com/site/binkbenk77/clicksound.ogg");</script>
    
    1. Hover Link With Sound
    <a href="URL" onmouseover="mouseoversound.playclipundefined)">HOVER LINK WITH SOUND</a>
    2. Click Link With Sound
    <a href="URL" onclick="clicksound.playclipundefined)">CLICK LINK WITH SOUND</a>
    
    [/lock]
    [info title="Info" icon="info-circle"] You Can Chane sound url File In JS [/info] Okay, that's all. Tips / How to make Link Alert With Sound, and that can be useful
    Any type of information please Contact us.
    switcher
    Layout
    Boxed Full
    Boxed Background Image
    Main Color
    #007ABE

    Shawon Khan

    {picture#https://blogger.googleusercontent.com/img/b/R29vZ2xl/AVvXsEh-a3-41YjYcJBZ5a8ARnrIkWEipCX5qC85U1TNiYgbjJtaIFGfVP5tGH2AqJOpDQCpktO4gvGceSGs2mFo8oDGHnw5RQIbSesYA7jEiCfHO8zoYhk3FNcKaXDjxIcSGKc6qL6_HvsmXiri/s50/avatku.jpg} Nor is it at all prudent for the hunter to be over curious touching the precise nature of the whale spout. {facebook#http://facebook.com} {twitter#http://twitter.com} {google#http://google.com} {pinterest#http://pinterest.com} {youtube#http://youtube.com}

    Contact Form

    Name

    Email *

    Message *

    Powered by Blogger.