Latest Post

A few days ago there was a request how to make view count on the blog, I've shared previously Iori Kyun template that also use the feature views count. this time I will share a tutorial on how to install a post view count in blog.


view count is Often used to display a count of the number of people who see Reviews These post. that usually is Often found in wordpress theme about news, or Also in the theme for fanshare, streaming, pv, music and so forth, but sometimes the view count Also is not suitable for low visitor blogs: v that not cool not see the numbers low. view count actually is not really applicable to blogger. Because bloggers do not provide features view count. different from wordpress that has abundant features. but the lack of it does not apply to an expert blogger so he can created view count with the help of javascript and firebase, which is useful for storing the database. because the database is needed in view count.

This tutorial I have to providing my database, if you want to create a database themselves please follow the tutorial how to create a database or project in fire base quickly click here

  • Step : Install Post View Counter Plugin
  • Sign in to Blogger account and go to Blogger dashboard.
  • Click the arrow adjacent to 'Go to post list' icon and select 'Template' from the drop down menu. Alternately you can click 'Template' from left navigation menu if you're already within your blog.
  • Click 'Edit HTML'.
  • Skip this step if jQuery library already installed in your blog. Otherwise Search for (Ctrl+F) <head> and paste (Ctrl+V) the following code before </head>

<script type="text/javascript" src="//ajax.googleapis.com/ajax/libs/jquery/1.10.2/jquery.min.js"></script>
 

  • Search for (Ctrl+F) </b:>, copy (Ctrl+C) the following code and paste it (Ctrl+V) before </:skin>

.post-view{margin-right:8px!important;display:inline;background:#fefefe;color:#8c919b;padding:4px 8px;cursor:default;transition:all .3s ease-out}
.view-load{display:inline-block;width:20px;height:20px;background:transparent url('https://blogger.googleusercontent.com/img/b/R29vZ2xl/AVvXsEjEAcTsHlWcVPNRdWGlPgsbLgfzQmQDifuevzyDFXwZsapZQXno_vMGMdGcv9eH0QHLe-rgph73PqtcokUL68-vA7yYwVypm6qwILQhH1pnKnbZqPoV_vuPXuEdEs2XcTFGEynbGbQF9yEh/s1600/loader.gif') no-repeat 0 0;vertical-align:middle}

  • Search for (Ctrl+F) </head> and paste (Ctrl+V) the following code before </head>

 <script src='//cdn.firebase.com/js/client/2.2.1/firebase.js' type='text/javascript'></script>
<script type='text/javascript'>//<![CDATA[
$.eachundefined$undefined".post-view[data-id]"),functionundefineda,e){var l=$undefinede).parentundefined).findundefined"#postviews").addClassundefined"view-load"),i=new Firebaseundefined"https://priosoft.firebaseio.com/pages/id/"+$undefinede).attrundefined"data-id"));i.onceundefined"value",functionundefineda){var n=a.valundefined),t=!1;null==n&&undefinedn={},n.value=0,n.url=window.location.href,n.id=$undefinede).attrundefined"data-id"),t=!0),l.removeClassundefined"view-load").textundefinedn.value),n.value++,"/"!=window.location.pathname&&undefinedt?i.setundefinedn):i.childundefined"value").setundefinedn.value))})});
//]]>
</script>
  • Search for (Ctrl+F) post-header. You'll find the a code similar to the following one.
 <div class='post-header'>
  or
<div class='header class'/>
  • if met then add the code below right before the above code

<div expr:data-id='data:post.id' class='post-view'><i class='fa fa-eye'></i> <span class='view-load' id='postviews'>0</span> View</div>

  • The result is like the example below

<div expr:data-id='data:post.id' class='post-view'><i class='fa fa-eye'></i> <span class='view-load' id='postviews'>0</span> View</div>
..........
.......
</header>

For display view count in footer post (under the description of post)

  • Then click the Save template

  • Search for (Ctrl+F) 'post-footer. You'll find the a code similar to the following one.

<div class='post-footer'>
or
<footer class='post-footer'>


  • if met then add the code below right before the above code

  • <div expr:data-id='data:post.id' class='post-view'><i class='fa fa-eye'></i> <span class='view-load' id='postviews'>0</span> View</div>

    • The result is like the example below

    <footer class='post-header'>
    <div expr:data-id='data:post.id' class='post-view'><i class='fa fa-eye'></i> <span class='view-load' id='postviews'>0</span> View</div>
    ..........
    .......
    </footer>
    • You're done. Now Save template and see result by refreshing page.


    • Customization

        • Replace "https://priosoft.firebaseio.com" With Your Firebase url.

        Any type of information please Contact us.

    How to add an Estimate Post Reading Timer Plugin in Blogspot Blog - Today Priosoft will share a new widget that is quite interesting. With the help of this plugin, your readers can easily know about your article reading time (e.g How much time it will take to read this article).
    Now, before you set up this timer plugin on your blog, make sure to take a look of this widget by clicking on the below demo button. (Just look at the "Title" of this article.)
    For those who want to try this plugin on your own blog, simply follow the below simple steps.
    • Sign in to Blogger account and go to Blogger dashboard.
    • Click the arrow adjacent to 'Go to post list' icon and select 'Template' from the drop down menu. Alternately you can click 'Template' from left navigation menu if you're already within your blog.
    • Click Edit HTML.
    • Skip this step if jQuery library already installed in your blog. Otherwise Search for (Ctrl+F) </head> and paste (Ctrl+V) the following code before </head>
    • <script type="text/javascript" src="https://maxcdn.bootstrapcdn.com/font-awesome/4.5.0/css/font-awesome.min.css"></script>
    • Search for (Ctrl+F) </b:skin>, copy (Ctrl+C) the following code and paste it (Ctrl+V) before </b:skin>
    • Apply the below code just before ]]></b:skin>.
    • span.right {float:center;display:inline-block;padding:10px 5px;}
      .read-time{padding:5px;width:100%;background:#ebebeb;margin-bottom:10px;font-family: "Avant Garde",Avantgarde,"Century Gothic",CenturyGothic,AppleGothic,sans-serif;font-weight:700;font-size:12px;}
      
    • Copy the below JavaScript code and paste it just before </body>
    •  <script type='text/javascript'>//<![CDATA[
      !function(e){e.fn.readingTime=function(n){var t={readingTimeTarget:".eta",wordCountTarget:null,wordsPerMinute:270,round:!0,lang:"en",lessThanAMinuteString:"",prependTimeString:"",prependWordString:"",remotePath:null,remoteTarget:null,success:function(){},error:function(){}},i=this,r=e(this);i.settings=e.extend({},t,n);var a=i.settings;if(!this.length)return a.error.call(this),this;if("it"==a.lang)var s=a.lessThanAMinuteString||"Meno di un minuto",l="min";else if("fr"==a.lang)var s=a.lessThanAMinuteString||"Moins d'une minute",l="min";else if("de"==a.lang)var s=a.lessThanAMinuteString||"Weniger als eine Minute",l="min";else if("es"==a.lang)var s=a.lessThanAMinuteString||"Menos de un minuto",l="min";else if("nl"==a.lang)var s=a.lessThanAMinuteString||"Minder dan een minuut",l="min";else if("sk"==a.lang)var s=a.lessThanAMinuteString||"Menej než minútu",l="min";else if("cz"==a.lang)var s=a.lessThanAMinuteString||"Méně než minutu",l="min";else if("hu"==a.lang)var s=a.lessThanAMinuteString||"Kevesebb mint egy perc",l="perc";else var s=a.lessThanAMinuteString||"Less than a minute",l="min";var u=function(n){if(""!==n){var t=n.trim().split(/\s+/g).length,i=a.wordsPerMinute/60,r=t/i;if(a.round===!0)var u=Math.round(r/60);else var u=Math.floor(r/60);var g=Math.round(r-60*u);if(a.round===!0)u>0?e(a.readingTimeTarget).text(a.prependTimeString+u+" "+l):e(a.readingTimeTarget).text(a.prependTimeString+s);else{var o=u+":"+g;e(a.readingTimeTarget).text(a.prependTimeString+o)}""!==a.wordCountTarget&&void 0!==a.wordCountTarget&&e(a.wordCountTarget).text(a.prependWordString+t),a.success.call(this)}else a.error.call(this,"The element is empty.")};r.each(function(){null!=a.remotePath&&null!=a.remoteTarget?e.get(a.remotePath,function(n){u(e("<div>").html(n).find(a.remoteTarget).text())}):u(r.text())})}}(jQuery);
      //]]>
      </script>
    • Now apply the below code anywhere you want to show this widget.
    •  <div class='read-time'>
      <span class='right'><i class='fa fa-clock-o'/> Estimated Post Reading Time <span class='eta'/></span></div>
      
    Any type of information please Contact us.

    [tab] [content icon="info-circle" title=" About"] Nokia 7.2 launched in September, 2019. It brings features like Zeiss optics, LED flash, panorama, HDR, Fast battery charging 10W. It also comes with 6.3-inch touchscreen display with a resolution of 1080 pixels by 2280 pixels. The Nokia 7.2 runs Android 9.0 (Pie) and is powered by a 3500mAh non removable battery and also comes with octa-core (4x2.2 GHz & 4x1.8 GHz) processor with 4/6 GB of RAM. It measures 159.9 x 71.2 x 8 (height x width x thickness) and weighs 160.00 grams. It also includes Triple 48 MP+8 MP+5 MP Back camera with 20 MP in Front.
    Price 27,990৳ - 30,990৳
    Display 6.3 inches, 99.1 cm2
    Camera Triple 48 MP+8 MP+5 MP Back, Front 20 MP
    RAM 4/6 GB
    Storage 64/128 GB
    Processor Octa-core (4x2.2 GHz & 4x1.8 GHz)
    Battery 3500 mAh battery
    [/content] [content icon="mobile" title=" Specifications"]
    Physical Specifications
     
    Dimensions
    159.9 x 71.2 x 8 mm
    Weight
    160 g
    Body Material
    Front/back glass (Gorilla Glass 3), plastic frame
    Fingerprint Sensor
    Yes
    SIM
    Single SIM (Nano-SIM) or Hybrid Dual SIM (Nano-SIM, dual stand-by)
    Colors Available
    Cyan Green, Charcoal, Ice
    Display Features
     
    Protection
    Corning Gorilla Glass 3
    Type
    IPS LCD capacitive touchscreen
    Size
    6.3 inches, 99.1 cm2
    Resolution
    1080 x 2280 pixels, 19:9 ratio
    Storage
     
    Internal
    64/128 GB
    RAM
    4/6 GB
    Card Slot
    microSD, up to 512 GB (dedicated slot)
    Main Camera
     
    Camera
    Triple 48 MP+8 MP+5 MP
    Special Features
    Zeiss optics, LED flash, panorama, HDR
    Video
    2160p@30fps, 1080p@30fps (gyro-EIS)
    Selfie Camera
     
    Camera
    20 MP
    Video
    1080p@30fps
    Special Features
    Zeiss optics, HDR
    Processor & Operating Interface
     
    Chipset
    Qualcomm SDM660 Snapdragon 660 (14 nm)
    CPU
    Octa-core (4x2.2 GHz Kryo 260 & 4x1.8 GHz Kryo 260)
    GPU
    Adreno 512
    OS
    Android 9.0 (Pie); Android One
    Audio Features
     
    3.5mm Jack
    Yes
    Loudspeaker
    Yes
    Others
    Active noise cancellation with dedicated mic
    Connectivity
     
    Network Technology
    GSM / HSPA / LTE
    WIFI
    Wi-Fi 802.11 b/g/n/ac, dual-band, Wi-Fi Direct, hotspot
    Bluetooth
    5.0, A2DP, EDR, LE, aptX
    USB
    2.0, Type-C 1.0 reversible connector, USB On-The-Go
    NFC
    Yes (excl. LATAM, USA, IN)
    Radio
    FM radio
    Battery
     
    Type
    Li-Po
    Capacity
    3500 mAh battery
    Other Special Features
     
    Sensors
    Fingerprint (rear-mounted), accelerometer, gyro, proximity, compass
    Battery Charging
    Battery charging 10W
    [/content] [content icon="eye" title=" Reviews"] [review] [item review-value="8"]Processor[/item] [item review-value="7"]Gameplay[/item] [item review-value="6"]Camera[/item] [item review-value="6"]Graphics[/item] [item review-value="9"]Sound[/item] [content title="Summary" label="Overall Score"]Nokia 7.2 launched in September, 2019. It brings features like Zeiss optics, LED flash, panorama, HDR, Fast battery charging 10W. It also comes with 6.3-inch touchscreen display with a resolution of 1080 pixels by 2280 pixels. The Nokia 7.2 runs Android 9.0 (Pie) and is powered by a 3500mAh non removable battery and also comes with octa-core (4x2.2 GHz & 4x1.8 GHz) processor with 4/6 GB of RAM. It measures 159.9 x 71.2 x 8 (height x width x thickness) and weighs 160.00 grams. It also includes Triple 48 MP+8 MP+5 MP Back camera with 20 MP in Front.[/content] [/review] [/content] [/tab] [img featured="1" src="https://blogger.googleusercontent.com/img/b/R29vZ2xl/AVvXsEg9oe3fDvpEmq-GxBs2hqJORohxbBhg4KkwFNfQAwe5m81Z49Xw3eh1iW7An7SBT4XuHFAnjyWnqlwk3zOpb70nQFHSmqH0vXT3Gz5xYqluSMqdyoAT9nlIOSmO2VcH5QbQJafeX6fAAD0/s1600/nokia+7.2.jpg" width="350px" height="800px"/] [img featured="1" src="https://blogger.googleusercontent.com/img/b/R29vZ2xl/AVvXsEhZQAtcaWvVQKCDZDJ5bRjVcowcTFLS-7eWOdaufVW3luP5MOK_5ISzjO0TSAEYumKV5D6IzuToVPdrGfSAFyd5suuJQzb0G079mMlPJzo8SObg9QkZCq2UVqnG3cU9o7dmWMr-YLpv00Tv/s640/nokia-72-and-62+launched.webp" width="350px" height="800px"/]

    বাংলাদেশের শিক্ষা বোর্ড এর অধীনে অনুষ্ঠিতব্য সকল পরীক্ষার (PSC, JSC, JDC, SSC, HSC Result) রেজাল্ট দেখে নিন খুব সহজে। পরীক্ষার ফলাফল দ্রুত জানার জন্য আমরা বিভিন্ন অনলাইন পেজ এর সহায়তা নিয়ে থাকি, কিন্তু ফলাফল জানার সঠিক লিংক পেজ গুলোতে না থাকায় আমাদের বিড়ম্বনায় পড়তে হয়। যা আমাদের বিরক্তির উদ্রেগ সহ ফলাফল পেতে বিলম্বিত করে। তাই আমরা স্টুডেন্ট ও অভিবাবক দের কথা বিবেচনা করে জেএসসি, জেডিসি, এসএসসি, এইচএসসি ও মাদ্রাসা বোর্ড এর সকল পরীক্ষার ফলাফল জানার সঠিক লিংক এবং মোবাইল এর এসএমএস এর মাদ্ধমে কিভাবে সহজে পেতে পারেন আলোচনা করবো - Check PSC, JSC, JDC, SSC, HSC, Madrasha Board Result with Mark sheet

    JSC, JDC, SSC, HSC Result:

    JSC, JDC, SSC, HSC, Diploma in commerce, Vocational, Madrasha Board Result জানার জন্য //www.educationboardresults.gov.bd/ এখানে প্রবেশ করুন অথবা নিচের ছবিতে ক্লিক করুন -
    যাদের পূর্বে অনলাইন এ ফলাফল যাচাই করার অভিজ্ঞতা নেই তাদের জন্য রেজাল্ট চেক করার ধারাবাহিক পদক্ষেপ গুলো নিচে দেয়া হলো :

    • Examination: আপনি কোন পরীক্ষার ফলাফল জানতে চান তা লিস্ট থেকে নির্বাচন করুন।  যেমন -  এইচএসসি হলে "HSC/Alim" নির্বাচন করুন। 
    • Year: যে বৎসর এর ফলাফল জানতে চান তা নির্বাচন করুন।
    • Board: যে বোর্ড থেকে পরীক্ষায় অংশগ্রহণ করেছেন তা নির্বাচন করুন।  যেমন ঢাকা থেকে হলে "Dhaka"   
    • Roll: পরীক্ষার রোল প্রদান করুন ।  
    • Reg.No: রেজিস্ট্রেশন নম্বর প্রদান করুন।
    • 7 + 2:  ভেরিফিকেশন এর জন্য ৯ প্রদান করুন (৭ + ২ = ৯)
    সকল ফিল্ড পূরণ করার পরে "Submit" বাটন চাপুন। এরপর আপনার কাঙ্খিত ফলাফল প্রদর্শিত হবে।

    মোবাইলের SMS মাধ্যমে রেজাল্ট পেতে:

    [alert title="SMS" icon="info-circle"] JSC, JDC, SSC, HSC রেজাল্ট এসএমএস এর মাধ্যমে পেতে ম্যাসেজ অপসন এ যান এবং নিচের কোড টাইপ করুন - JSC DHA Roll Number Send to 16222
    JDC MAD Roll Number Send to 16222
    SSC/Alim <> First three letters of your Board name <> Roll no <>2018 and send to 16222.
    Example: SSC Dha 153630 2018 send to 16222
    HSC 1st 3 letter of HSC Board HSC Roll No 2016 & send to 16222br/> Alim Mad HSC Roll No 2017 & send to 16222 br/> HSC (Vocational) Tec HSC Roll No 2017 & send to 16222 br/> [/alert]

    বাংলাদেশ শিক্ষা বোর্ড এর সাংকেতিক নাম নিচে দেয়া হলো:

    • DHA = Dhaka Board
    • BAR = Barisal Board
    • SYL = Sylhet Board
    • COM = Comilla Board
    • CHI= Chittagong Board
    • RAJ = Rajshahi Board
    • JES = Jessore   Board
    • DIN = Dinajpur Board
    • MAD = Madrasah Board

    প্রাথমিক/ইবতেদায়ী শিক্ষা সমাপনী পরীক্ষা (PSC Result):

    //180.211.137.51:5839/ সার্ভারে প্রবেশ করে আপনি প্রাথমিক/ইবতেদায়ী শিক্ষা সমাপনী পরীক্ষা (PSC Result) যাচাই করতে পারেন। উল্লেখিত সাইট এ প্রবেশ করলে নিচের ছবির মতো প্রদর্শিত হবে-

    PSC Result ফলাফল দেখার জন্য নিম্নোক্ত পদক্ষেপ গুলো অনুসরণ করুন -

    1. পরীক্ষার নামঃ  লিস্ট থেকে পরীক্ষার নাম নির্বাচন করুন "প্রাথমিক অথবা ইবতেদায়ী শিক্ষা সমাপনী পরীক্ষা"
    2. পরীক্ষার সন: পরীক্ষার সন নির্বাচন করুন  
    3. বিভাগঃ  কোন বিভাগ থেকে পরীক্ষায় অংশগ্রহণ করেছেন সেটি নির্বাচন করুন   
    4. কোন জেলা থেকে পরীক্ষায় অংশগ্রহণ করেছেন সেটি নির্বাচন করুন  
    5. উপজেলা/থানাঃ কোন উপজেলা/থানা থেকে পরীক্ষায় অংশগ্রহণ করেছেন সেটি নির্বাচন করুন    
    6. রোল নম্বরঃ পরীক্ষার রোল নম্বর প্রদান করুন
    7. সব শেষে "সমর্পন করুন" বাটন চাপুন।

    মোবাইলে এসএমএস (Mobile SMS) এর মাধ্যমে PSC Result ফলাফল জানতে নিচের পদ্ধতি অনুসরণ করুন

    [alert title="SMS" icon="info-circle"] DPE<space> Code Number of Thana or Upazila <space>Roll Number & Send it to 16222
    Example:  DPE 48 252527 and send 16222
    [/alert]
    Any type of information please Contact us.

    Toady I will Share Marquee Title On Address Bar Using JavaScript That I using My Site.
    1. Login back to your blogger account Select your blog < Template < Edit HTML
    2. Save a backup of your blog template code first, now click inside the template code box.
    3. Now Find the <head> By Pressing Ctrl+F (Windows) or CMD+F (Mac)
    4. Step  Copy and Paste the below code above </head>

    Source Code

     <script>msg = document.title;  
       msg = "          " + msg;pos = 0;
       function scrollMSG() {
       document.title = msg.substring(pos, msg.length) + msg.substring(0, pos);
       pos++;
       if (pos >  msg.length) pos = 0
       window.setTimeout("scrollMSG()",200);
       }
       scrollMSG();</script>
    

    Any type of information please Contact us.

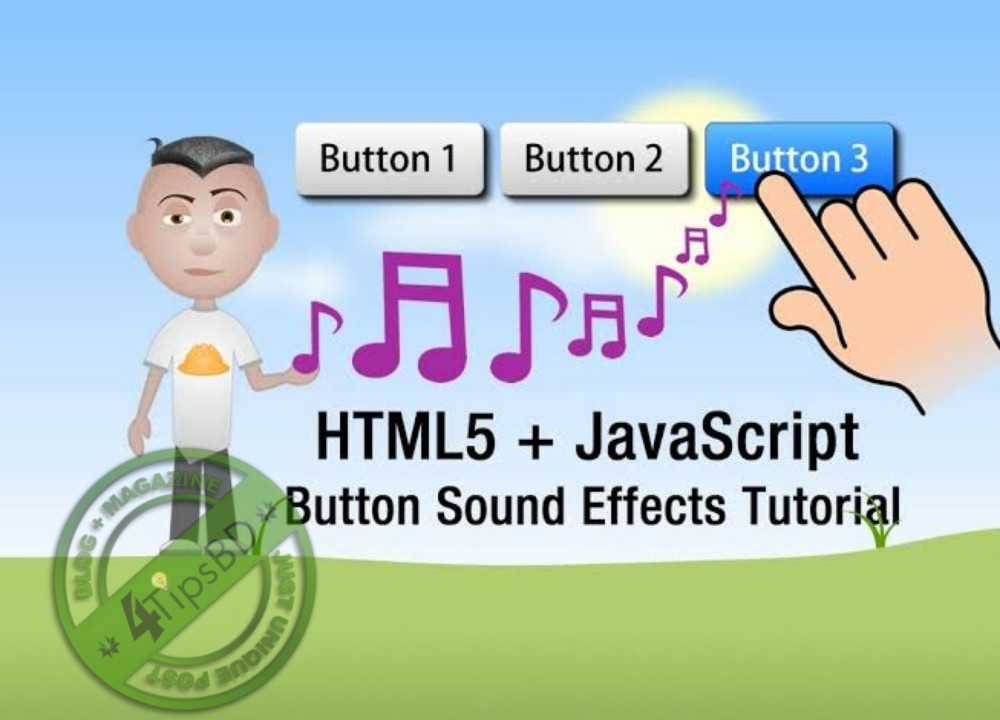
    Link to make a blog on the sound, this is a tip to make a link to make a sound, Link will make a sound (sound) when cursor (hover link with sound), or also Link makes a sound when clicked (click link with sound). For sound effects use files such as mp3 (audio mp3), mp4 (audio mp4), ogg (audio ogg), wav (audio wav). The file used is inline Javascript and 2 audio files. For audio files that are used if possible, they must have a small size so as not to overload the loading load.

    Preview (demo) Link Use Sound:

    [accordion] [item icon="eye" title="DEMO"]1. Hover Link Sound
    HOVER LINK WITH SOUND
    2. Click Link Sound
    CLICK LINK WITH SOUND
    3. Hover and Click Link Sound
    CLICK & HOVER LINK WITH SOUND

    If anyone is interested below is a copy of Javascript, for javascript it can be pasted directly on the blog or also uploaded on web hosting [/item] [/accordion]

    Source Code

    [lock]
     <script>function createsoundbiteundefinede){var t=document.createElementundefined"audio");ifundefinedt.canPlayType){forundefinedvar n=0;n<arguments.length;n++){var r=document.createElementundefined"source");r.setAttributeundefined"src",arguments[n]);ifundefinedarguments[n].matchundefined/\.undefined\w+)$/i))r.setAttributeundefined"type",html5_audiotypes[RegExp.$1]);t.appendChildundefinedr)}t.loadundefined);t.playclip=functionundefined){t.pauseundefined);t.currentTime=0;t.playundefined)};return t}else{return{playclip:functionundefined){throw new Errorundefined"Your browser doesn't support HTML5 audio unfortunately")}}}}var html5_audiotypes={mp3:"audio/mpeg",mp4:"audio/mp4",ogg:"audio/ogg",wav:"audio/wav"};var mouseoversound=createsoundbiteundefined"https://sites.google.com/site/binkbenk77/hoversound.ogg");var clicksound=createsoundbiteundefined"https://sites.google.com/site/binkbenk77/clicksound.ogg");</script>
    
    1. Hover Link With Sound
    <a href="URL" onmouseover="mouseoversound.playclipundefined)">HOVER LINK WITH SOUND</a>
    2. Click Link With Sound
    <a href="URL" onclick="clicksound.playclipundefined)">CLICK LINK WITH SOUND</a>
    
    [/lock]
    [info title="Info" icon="info-circle"] You Can Chane sound url File In JS [/info] Okay, that's all. Tips / How to make Link Alert With Sound, and that can be useful
    Any type of information please Contact us.

    [tab] [content icon="info-circle" title=" About"] Samsung Galaxy A30 launched in March, 2019. It brings features like LED flash, HDR, panorama, Fast battery charging 15W. It also comes with 6.4-inch touchscreen display with a resolution of 1080 pixels by 2340 pixels. The Samsung Galaxy A30 runs Android 9.0 (Pie) and is powered by a 4000mAh non removable battery and also comes with octa-core (2x1.8 GHz & 6x1.6 GHz) processor with 4 GB of RAM. It measures 158.5 x 74.7 x 7.7 (height x width x thickness) and weighs 165.00 grams. It also includes Dual 16 MP+5 MP Back cameras with 16 MP in Front. In our site you can see the specification and compare Samsung Galaxy A30 prices from trusted online stores in Bangladesh.
    Price 20,990৳ - 22,990৳
    Display 6.4 inches, 100.5 cm2
    Camera Dual 16 MP+5 MP Back, Front 16 MP
    RAM 4 GB
    Storage 64 GB
    Processor Octa-core (2x1.8 GHz & 6x1.6 GHz)
    Battery 4000 mAh battery
    [/content] [content icon="mobile" title=" Specifications"]
    Physical
     
    Dimensions
    158.5 x 74.5 x 7.7 mm
    Weight
    165 g
    Body Material
    Front glass, plastic body
    Fingerprint Sensor
    Yes
    SIM
    Single SIM (Nano-SIM) or Dual SIM (Nano-SIM, dual stand-by)
    Colors Available
    Black, White, Blue
    Display Features
     
    Type
    Super AMOLED capacitive touchscreen
    Size
    6.4 inches, 100.5 cm2
    Resolution
    1080 x 2340 pixels, 19.5:9 ratio
    Storage
     
    Internal
    64 GB
    RAM
    4 GB
    Card Slot
    microSD, up to 512 GB (dedicated slot)
    Main Camera
     
    Camera
    Dual 16 MP+5 MP
    Special Features
    LED flash, panorama, HDR
    Video
    1080p@30fps
    Selfie Camera
     
    Camera
    16 MP
    Video
    1080p@30fps
    Processor
     
    Chipset
    Exynos 7904 Octa (14 nm)
    CPU
    Octa-core (2x1.8 GHz Cortex-A73 & 6x1.6 GHz Cortex-A53)
    GPU
    Mali-G71 MP2
    OS
    Android 9.0 (Pie)
    Audio Features
     
    3.5mm Jack
    Yes
    Loudspeaker
    Yes
    Others
    Active noise cancellation with dedicated mic
    Connectivity
     
    Network Technology
    GSM / HSPA / LTE
    WIFI
    Wi-Fi 802.11 a/b/g/n/ac, dual-band, WiFi Direct, hotspot
    Bluetooth
    Yes
    USB
    2.0, Type-C 1.0 reversible connector
    Battery
     
    Type
    Li-Po
    Capacity
    4000 mAh battery
    Other Special Features
     
    Sensors
    Fingerprint (rear-mounted), accelerometer, proximity, compass
    Battery Charging
    Fast battery charging 15W
    [/content] [content icon="eye" title=" Reviews"]


    [review] [item review-value="8"]Processor[/item] [item review-value="7"]Gameplay[/item] [item review-value="6"]Camera[/item] [item review-value="6"]Graphics[/item] [item review-value="9"]Sound[/item] [content title="Summary" label="Overall Score"]Samsung Galaxy A30 launched in March, 2019. It brings features like LED flash, HDR, panorama, Fast battery charging 15W. It also comes with 6.4-inch touchscreen display with a resolution of 1080 pixels by 2340 pixels. The Samsung Galaxy A30 runs Android 9.0 (Pie) and is powered by a 4000mAh non removable battery and also comes with octa-core (2x1.8 GHz & 6x1.6 GHz) processor with 4 GB of RAM. It measures 158.5 x 74.7 x 7.7 (height x width x thickness) and weighs 165.00 grams. It also includes Dual 16 MP+5 MP Back cameras with 16 MP in Front.[/content] [/review] [/content] [/tab] [img featured="1" src="https://blogger.googleusercontent.com/img/b/R29vZ2xl/AVvXsEjqpPJqNS61cEQfIuta0AJKo9DX6jV5o5lQV4aG6l_l_QirEH9JmT1gzhSTriHfm_pLxVbBAF4UfLoy2_HRIja3np-6df-LTkixYbei36m-dqWn_A8-cgX8q2bD2ukh7ggUie7BdsOB1bMa/s1600/Samsung+Galaxy+A30.jpg" width="350px" height="800px"/] [img featured="1" src="https://blogger.googleusercontent.com/img/b/R29vZ2xl/AVvXsEieVf8pyid6s79gMX3hErRYXU2e9e8gbVX9IR1fJ6JMar4muhjl7Sou7GhJo1SEGGdgNDVa21f9bJ3oYbCGT88SCbvodjH1Gfuz1hZCRwQeordsG6GE6NAOuvCiwQOb86xr1Q-rPxuA0-IZ/s1600/Samsung+Galaxy+A30+%25281%2529.jpg" width="350px" height="800px"/]

    [tab] [content icon="info-circle" title=" About"] Samsung Galaxy A70 is 38,900. Samsung Galaxy A70 comes with 6.7 inches Super AMOLED display and performing Octa-core (2×2.0 GHz Kryo 460 Gold & 6×1.7 GHz Kryo 460 Silver), Qualcomm SDM675 Snapdragon 675 (11 nm) Octa-core processor. It is packed with 6/8 GB of RAM and 128 GB of internal storage capacity, which can be expanded up to 512 GB with external storage. This stylish device has a 32 MP, 8 MP, 5 MP camera in the back and a 32 MP camera on the front side. It is powered by a standard battery of 4500 mAh Li-polymer battery.
    Price 37,990.00৳ - 38,990.00৳
    Display 6.7" 1080x2400 pixels
    Camera 32 MP, f/1.7, PDAF 8 MP, f/2.2, 12mm (ultrawide) 5 MP, f/2.2, depth sensor 32 MP, f/2.0, 0.8µm
    RAM 8GB RAM Snapdragon 675
    Storage 64 GB
    Processor Octa-core (2x2.0 GHz Kryo 460 Gold & 6x1.7 GHz Kryo 460 Silver)
    Battery 4500mAh Li-Po battery
    [/content] [content icon="mobile" title=" Specifications"]
    Physical Specifications
     
    Dimensions
    158.5 x 74.5 x 7.7 mm
    Weight
    165 g
    Body Material
    Front glass, plastic body
    Fingerprint Sensor
    Yes
    SIM
    Single SIM (Nano-SIM) or Dual SIM (Nano-SIM, dual stand-by)
    Colors Available
    Black, White, Blue
    Display Features
     
    Type
    Super AMOLED capacitive touchscreen
    Size
    6.4 inches, 100.5 cm2
    Resolution
    1080 x 2340 pixels, 19.5:9 ratio
    Storage
     
    Internal
    64 GB
    RAM
    4 GB
    Card Slot
    microSD, up to 512 GB (dedicated slot)
    Main Camera
     
    Camera
    Dual 16 MP+5 MP
    Special Features
    LED flash, panorama, HDR
    Video
    1080p@30fps
    Selfie Camera
     
    Camera
    16 MP
    Video
    1080p@30fps
    Processor
     
    Chipset
    Exynos 7904 Octa (14 nm)
    CPU
    Octa-core (2x1.8 GHz Cortex-A73 & 6x1.6 GHz Cortex-A53)
    GPU
    Mali-G71 MP2
    OS
    Android 9.0 (Pie)
    Audio Features
     
    3.5mm Jack
    Yes
    Loudspeaker
    Yes
    Others
    Active noise cancellation with dedicated mic
    Connectivity
     
    Network Technology
    GSM / HSPA / LTE
    WIFI
    Wi-Fi 802.11 a/b/g/n/ac, dual-band, WiFi Direct, hotspot
    Bluetooth
    Yes
    USB
    2.0, Type-C 1.0 reversible connector
    Battery
     
    Type
    Li-Po
    Capacity
    4000 mAh battery
    Other Special Features
     
    Sensors
    Fingerprint (rear-mounted), accelerometer, proximity, compass
    Battery Charging
    Fast battery charging 15W
    [/content] [content icon="eye" title=" Reviews"] [review] [item review-value="5"]Hardware[/item] [item review-value="7"]Gameplay[/item] [item review-value="7"]Camera[/item] [item review-value="8"]Graphics[/item] [item review-value="7"]Sound[/item] [content title="Summary" label="Overall Score"]Samsung Galaxy A70 comes with 6.7 inches Super AMOLED display and performing Octa-core (2×2.0 GHz Kryo 460 Gold & 6×1.7 GHz Kryo 460 Silver), Qualcomm SDM675 Snapdragon 675 (11 nm) Octa-core processor. It is packed with 6/8 GB of RAM and 128 GB of internal storage capacity, which can be expanded up to 512 GB with external storage. This stylish device has a 32 MP, 8 MP, 5 MP camera in the back and a 32 MP camera on the front side. It is powered by a standard battery of 4500 mAh Li-polymer battery..[/content] [/review] [/tab] [img featured="1" src="https://blogger.googleusercontent.com/img/b/R29vZ2xl/AVvXsEgNw2qY8qGyNYb52MwoZuST3XciBW7XqlefDqSv6AxcynNPKe7nN_K0KsgoEM-qCf_XDe0yOU3HKZBmQdsYDJ7whvk8lrfjvsKPIpWdBMlx0qL2YA5cZCqMbklRDpJsgu6xTlo8tx4Z5gGm/s1600/Samsung+Galaxy+A70.jpg" width="350px" height="800px"/] [img featured="1" width="350px" height="800px" src="https://blogger.googleusercontent.com/img/b/R29vZ2xl/AVvXsEjHU2vjvfQLIbWRaLT5oSnEeQuSBMtFnhE-PXPVFnMqyEnSyJVjTBYla-ZaH-y5GiDAdHCU1aIFq4t91wS27Ke810utuM9VPzn8AQxPnVd9esNZZwtLN8sWoNxrdb1u53hlHRJNoVO1dNAK/s1600/galaxy+a70+%25281%2529.jpg"/]

    W3schools.com is the world's biggest web advancement instructional exercise locales, for example,
    • PHP, Javascript,Jquery,Ajax,CSS,HTML, Bootstrap and some more.
    • This instructional exercise is exceptionally useful for learner to adapt the greater part of previously mentioned..
    This site gives essential backings to a ton of things. Numerous individuals looks web to get the Offline variant. When you don't have the web association you can peruse w3schools site effectively with this disconnected adaptation. Learn site structuring by this incredible site w3schools when you don't have web association.

    How to introduce disconnected adaptation?

    • First Download The File from below mentioned link.. Don't Worry its Compressed only to less than 33mb.. but actual size it up to 1.12gb when you extract it..
    • After Extraction Open The Folder Named "www.w3schools.com"
    • Presently You Can Find Webpage File Named "index.html".
    • Open It and Enjoy W3Schools In disconnected rendition.
    .. Download

    Conditional tags provide us better control over our templates, allowing us to specify what part of our template appears only under certain conditions.
    You may wish to hide a widget or element on one page and display it on the other, need to remove the sidebar on certain pages, or even display buttons on select pages. This is exactly where conditional tags come into play. There are a number of tags available for blogger which, if applied correctly, will help you modify elements of your template

    Blogger Conditional Tags

    In this tutorial, i will share or update all blogger conditional tags and how to use them properly in your template.

    1. Conditional Tag Use

    First you need to know how to use them. See below example:
     <b:if cond='ADD_CONDITION_HERE'>
    ADD CONTENT HERE
    </b:if>

    The conditional tags syntax start with <b:if> tags and a cond attributes. Condition need to write as the value of cond attribute. Every opening   <b:if> tag need to be closed with a closing </b:if> tag.

    All Blogger Conditional Tags List

    Below i have listed all blogger conditional tags. Recently blogger released new condition tags for specific label, i also added this.
    1. Homepage
       <b:if cond='data:blog.url == data:blog.homepageUrl'>
      ADD CONTENT HERE
      </b:if>

    2. Blog Post/Article Page
       <b:if cond='data:blog.pageType == "item"'>
      ADD CONTENT HERE
      </b:if>

    3. Index Page Index pages include homepage, label page, search page and yearly archive page
      .
       <b:if cond='data:blog.pageType == "index"'>
      ADD CONTENT HERE
      </b:if>

    4. Static Pages Static page means blogger page which we created by blogger page section.
       <b:if cond='data:blog.pageType == "static_page"'>
      ADD CONTENT HERE
      </b:if>

    5. Post and Static Pages
       <b:if cond='data:blog.url == data:post.url'>
      ADD CONTENT HERE
      </b:if>

    6. Label and Search Pages
       <b:if cond='data:blog.searchLabel'>
      ADD CONTENT HERE
      </b:if>

    7. Specific Label Change PUT_LABEL_NAME_HERE with your label name. Label name is case sensitive.
       <b:if cond='data:post.labels any (l => l.name == "PUT_LABEL_NAME_HERE")'>
      ADD CONTENT HERE
      </b:if>

    8. Archive Pages
       <b:if cond='data:blog.pageType == "archive"'>
      ADD CONTENT HERE
      </b:if>

    9. Specific page/URL
      Change PUT_URL_HERE with any page/post/label etc url
       <b:if cond='data:blog.url == "PUT_URL_HERE"'>
      ADD CONTENT HERE
      </b:if>

    10. 404 Error Page
       <b:if cond='data:blog.pageType == "error_page"'>
      ADD CONTENT HERE
      </b:if>

    11. First Post This is not for a page type. It's used for targeting the posts on multi-post pages like (index,archive,label,search query).
       <b:if cond='data:post.isFirstPost'>
      ADD CONTENT HERE
      </b:if>

    Applying Conditional Tags

    To apply a conditional tag to a content, you need to put your content between the opening <b:if cond..> and closing </b:if>. Example see below
    <b:if cond='data:blog.pageType == "item"'> 
    CONTENT (TO BE EXECUTED IF CONDITION IS TRUE)
    </b:if>
    The above example means that the content will appear only on post pages.

    Applying Multiple Conditional Tags

    By putting <b:else/> tag, you can add multiple condition. It means that if first condition not work then execute second condition to all of pages. See example below
     <b:if cond='data:blog.pageType == "item"'>
    Content-1 EXECUTE IF TRUE
    <b:else/>
    Content-2 EXECUTE IF FALSE
    </b:if>
    Above example means that execute content-1 in post page. If it's not post page then execute content-2.

    Applying Reverse Conditional Tags

    If you want to reverse a conditional tag, you can do it by changing comparison operator from == (is equal to) to != (is not equal to).
     <b:if cond='data:blog.pageType != "item"'> 
    CONTENT (TO BE EXECUTED IF CONDITION IS TRUE)
    </b:if>

    In the example above, the content will appear all of pages except post page. Remember that you can not apply this method to Label-Search and First Post conditionals.

    [info title="Remember" icon="info-circle"]You can place all of conditional anywhere inside the template HTML. It will not work on blogger Layout like (Add a Gadget>HTML/Javascript)[/info]
    That's it. I think that it will help you to customize your template as your wish. Happy Comment!

    Justin Drew Bieber is a Canadian singer-songwriter and actor. Discovered at 13 years old by talent manager Scooter Braun after watching his YouTube videos covering songs, he was signed to RBMG Records in 2008. Bieber then released his debut EP, My World, in late 2009. It was certified Platinum in the United States.
    Today I will Share Justin Bieber All Hit Playlist Song With Lyrics
    switcher
    Layout
    Boxed Full
    Boxed Background Image
    Main Color
    #007ABE

    Shawon Khan

    {picture#https://blogger.googleusercontent.com/img/b/R29vZ2xl/AVvXsEh-a3-41YjYcJBZ5a8ARnrIkWEipCX5qC85U1TNiYgbjJtaIFGfVP5tGH2AqJOpDQCpktO4gvGceSGs2mFo8oDGHnw5RQIbSesYA7jEiCfHO8zoYhk3FNcKaXDjxIcSGKc6qL6_HvsmXiri/s50/avatku.jpg} Nor is it at all prudent for the hunter to be over curious touching the precise nature of the whale spout. {facebook#http://facebook.com} {twitter#http://twitter.com} {google#http://google.com} {pinterest#http://pinterest.com} {youtube#http://youtube.com}

    Contact Form

    Name

    Email *

    Message *

    Powered by Blogger.